
One of the most important steps you can take to protect your family, pets and home is focusing on emergency preparedness.
We encourage our clients to prepare for and practice how to respond to disasters, particularly those that we’re likely to experience in the Pacific Northwest: wildfires, earthquakes, flooding and severe storms. Emergencies tend to occur at the least convenient times and hit the hardest when we aren’t prepared. Because of this, we recommend that every family have an emergency kit and disaster preparedness plan.
We invite our clients and friends to use the McClain Insurance 30-Day Preparedness Challenge to develop and practice emergency plans. You can complete it all at once, in chunks, or day by day over the course of a month.
Our challenge follows the following weekly themes:
- Week 1: Make and Practice Your Plan
- Week 2: Learn Life Saving Skills
- Week 3: Check Your Coverage
- Week 4: Save For an Emergency
Let’s get started!
McClain Insurance-30 Day Preparedness Challenge
Day 1: Set Emergency Preparedness Goals
Today’s task is simple. Take a few minutes to set your intentions for this emergency preparedness challenge. Write down your top three goals so you have something specific to work toward over the next 30 days.
Not sure where to get started? Here are agent Ashley Abrams’s goals:
- Assemble a basic home emergency kit
- Create a fire escape plan and practice it
- Learn how to turn off the water and gas to my home
After you write your three goals, share them with us on social media using the hashtag #McClainPrepares.
Day 2: Sign Up For Emergency Alerts
Receiving timely information about weather conditions or other emergency events can make all the difference in knowing when to take action to be safe.
Download FEMA’s “Be Smart. Take Part. Know Your Alerts and Warnings” guide here.
At a minimum, we encourage clients to download the Federal Emergency Management’s official app for Apple and Android mobile devices. The free app allows users to:
- Receive real-time alters from the National Weather Service for up to five locations nationwide
- Learn emergency safety tips for over 20 types of disasters, including earthquakes, fires, and floods
- Locate open emergency shelters in your area and find disaster recovery centers where you can talk to FEMA in person
- Prepare for disasters with a customizable emergency kit checklist, emergency family plan, and reminders
FEMA’s app is available in English and Spanish.
If you’re located in Western Washington, you may also want to click the links below for information about how to sign up for local alerts in your area:
- Grays Harbor County
- King County (Outside of Seattle)
- Seattle
- Pierce County (Outside of Tacoma)
- Tacoma
- Snohomish County (Outside Everett)
- Everett
- Whatcom County
- Thurston County
- Skagit County
- Clallam County
- Jefferson County
- Mason County
- Lewis County
For a complete list of emergency alerts throughout Washington, visit the Washington State Department of Emergency Management’s disaster preparedness website.
Day 3: Make a Communication Plan

Day 4: Research What Disaster You’re Most at Risk For
Before making your emergency preparedness plan, it’s important to know what types of disasters you’re most at risk for. According to the Washington State Emergency Management Division, Pacific Northwest residents face the following natural and technological hazards:
- Avalanches – Avalanches have killed more than 190 people in the past century, exceeding deaths from any other natural cause.
- Drought – In the past century, Washington State has experienced a number of drought episodes, including several that lasted for more than a single season.
- Earthquake – More than 1,000 earthquakes occur in Washington each year. A dozen or more are felt; occasionally, they cause damage.
- Flood – Damage from flooding exceeds damage by all other natural hazards in Washington State.
- Landslide – Landslide is the movement of rock, soil, and debris down a hillside or slope. Landslides take lives, destroy homes, businesses, and public buildings, interrupt transportation, undermine bridges, derail train cars, cover clam and oyster beds, and damage utilities.
- Severe Storm – All areas of Washington State are vulnerable to severe weather. A severe storm is an atmospheric disturbance that results in one or more of the following phenomena: strong winds, large hail, thunderstorm, tornado, rain, snow, or freezing rain.
- Tsunami – The Pacific Coast, Strait of Juan de Fuca, Puget Sound, and large lakes are at risk from tsunamis, trains of powerful waves that threaten people and property along shorelines.
- Volcano – Washington has five major volcanoes – Mount Baker, Glacier Peak, Mount Rainier, Mount St. Helens and Mount Adams. The risk posed by volcanic activity is not always apparent, as volcanoes can lie dormant for centuries between eruptions.
- Wildfire – Short-term loss caused by wildland fire can include the destruction of timber, wildlife habitat, scenic vistas, and watersheds, and increase vulnerability to flooding. Long-term effects include smaller timber harvests, reduced access to affected recreational areas, and destruction of cultural and economic resources and community infrastructure.
- Hazardous Material – Hazardous material incidents are intentional and/or unintentional releases of a material, that because of their chemical, physical, or biological nature, pose a potential risk to life, health, environment, or property.
- Radiological – A radiological hazard is the uncontrolled release of radioactive material that can harm people or damage the environment.
FEMA also has an extensive database of disasters and hazards that can affect your family. Each hazard type links to information on what to do before, during, and after each type of emergency. You can access FEMA’s database by clicking here.
Day 5: Make an Emergency Plan
Disasters don’t plan ahead. You can. Make your emergency plan today.
When making your emergency plan, be sure to consider the specific needs of your household, including children and pets. FEMA recommends keeping the following factors in mind when customizing your plan:
- Different ages of members within your household
- Responsibilities for assisting others
- Locations frequented
- Dietary needs
- Medical needs including prescriptions and equipment
- Disabilities or access and functional needs including devices and equipment
- Languages spoken
- Cultural and religious considerations
- Pets or service animals
- Households with school-aged children
Download FEMA’s “Be Smart. Take Part. Create Your Family Emergency Communication Plan” guide here.
The American Red Cross and Washington State Emergency Management Division also have extensive resources on how to create and your emergency plan. Many resources are available in English and Spanish.
Download the American Red Cross’s Family Disaster Plan template here.
Day 6: Discuss Your Emergency Plan With Your Family
After you customize your family’s emergency plan, make sure everyone in your household has the information. FEMA recommends you:
- Make copies of your Family Emergency Communication Plan for each member of the household to carry in his or her wallet, backpack, or purse. Post a copy in a central place at home. Regularly check to make sure your household members are carrying their plan with them. Enter household and emergency contact information into all household members’ mobile phones or devices.
- Store at least one emergency contact under the name “In Case of Emergency” or “ICE” for all mobile phones and devices. This will help someone identify your emergency contact if needed. Inform your emergency contact of any medical issues or other requirements you may have.
- Create a group list on all mobile phones and devices of the people you would need to communicate with if there was an emergency or disaster.
- Make sure all household members and your out-of-town contact know how to text if they have a mobile phone or device, or know alternative ways to communicate if they are unable to text.
Day 7: Practice Your Emergency Plan
Day 8: Have Family Fire & Earthquake Drills
Visit each room of your house and find two ways out, including windows and doors. Make sure all escape routes open easily so you can get outside, and install emergency release devices on any security bars on doors or windows.
Day 9: Test Your Smoke and Carbon Monoxide Detectors
Put smoke and carbon monoxide alarms on every level of your home. Test them monthly, and replace them when they are 10 years old.
In the video below, firefighters use a simulated house fire to explain why this is so important:
If your carbon monoxide alarm ever goes off, evacuate your home immediately and call 911.
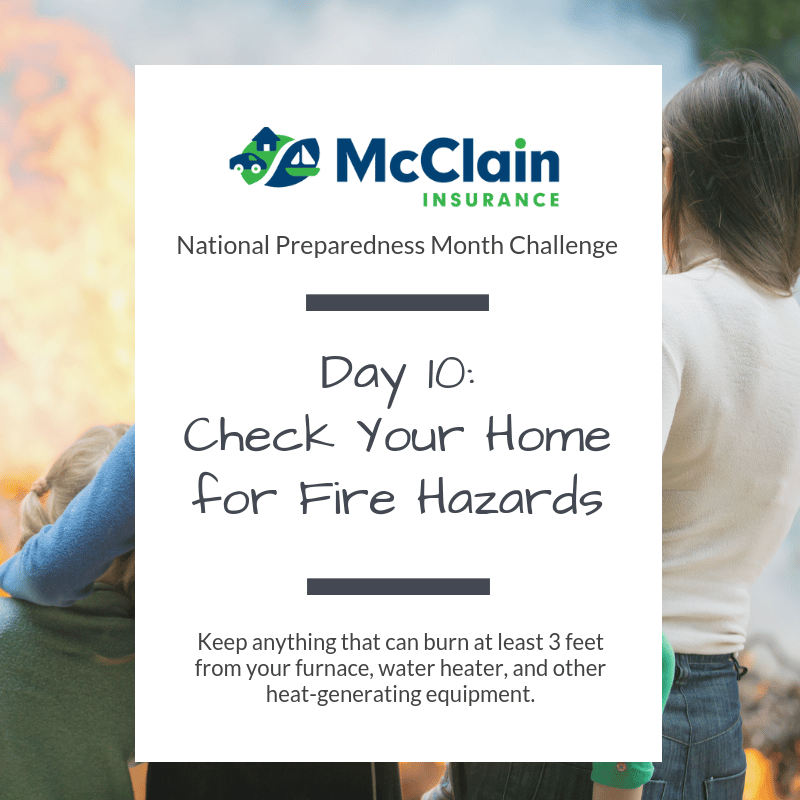
Day 10: Check Your Home for Fire Hazards
Every 24 seconds, a U.S. fire department responds to a blaze. Every 66 seconds, someone in America reports a structure fire. And every 34 minutes, a fire results in a civilian injury.
This is why it’s so important to keep anything that can burn at least 2 feet from your furnace, water heater, and other heat-generating equipment.
Our friends at Travelers Insurance analyzed eight years of claims data and discovered fire accounted for 25% of their claims costs, making it the most expensive peril to property. According to Travelers claims data, the most common causes of fire-related losses are:
- Faulty wiring and outlets. Check the electrical cords throughout your home for signs of fraying, and replace all frayed wires. Do not pinch or cover electrical cords with items such as rugs. Be aware of the capacity of your home’s electrical system. Do not overload your circuits.
- Carelessness in the kitchen. Built up food splatter or grease can later ignite when the stove or oven is turned on for cooking. Never leave pots and pans on the stove unattended.
- Clothes dryers. Clean out the lint filter after each load, and clean the dryer vent and regularly. Lint may also collect under and behind your dryer, so do not forget to clean these areas.
- Alternative heating sources. Avoid using older space heaters, and avoid putting them near furniture, curtains, or other objects that can easily catch fire. Never leave a space heater unattended.
- Dirty chimneys. Have your chimney inspected annually by a Chimney Safety Institute of America (CSIA)-certified chimney sweep. Never burn cardboard boxes, wrapping paper, trash or trees in your fireplace—these can all spark chimney fires.

Day 11: Learn How to Use a Fire Extinguisher
Make sure you have one or more up-to-date fire extinguishers in your home. Be sure everyone knows where they are kept and how to use them.
Here’s a great how-to video from the City of Seattle Office of Emergency Management:
The Seattle Office of Emergency Management recommends having an ABC fire extinguisher in your home. An ABC fire extinguisher is effective against fires fueled by combustibles like wood and paper; fires fueled by flammable liquids like gasoline and grease; and electrical fires.
Before using a fire extinguisher, it’s important to keep several things in mind:
- Always have a way out. Don’t let the fire block your way the door.
- Fire extinguishers are small, quick fixes. If you’re unable to put out the fire with one fire extinguisher, leave and close the door behind you.
- Don’t fight a fire that makes you uncomfortable or puts you at risk.
- Call 911 before attempting to put out a fire. But keep in mind that after a large disaster, you may not be able to get through to 911.
There are four basic steps to using a fire extinguisher, which can be remembered with the word PASS:
- PULL the pin out of the fire extinguisher handle
- AIM the fire extinguisher nozzle at the base of the fire
- SQUEEZE the handle to discharge the fire extingusher
- SWEEP back and force across the base of the fire
For more in-depth information on how to use a fire extinguisher, watch the Snohomish County Planning and Development’s Portable Fire Extinguisher Training:
Don’t forget that fire extinguishers expire. According to the National Fire Protection Association, disposable fire extinguishers must be replaced every 12 years.
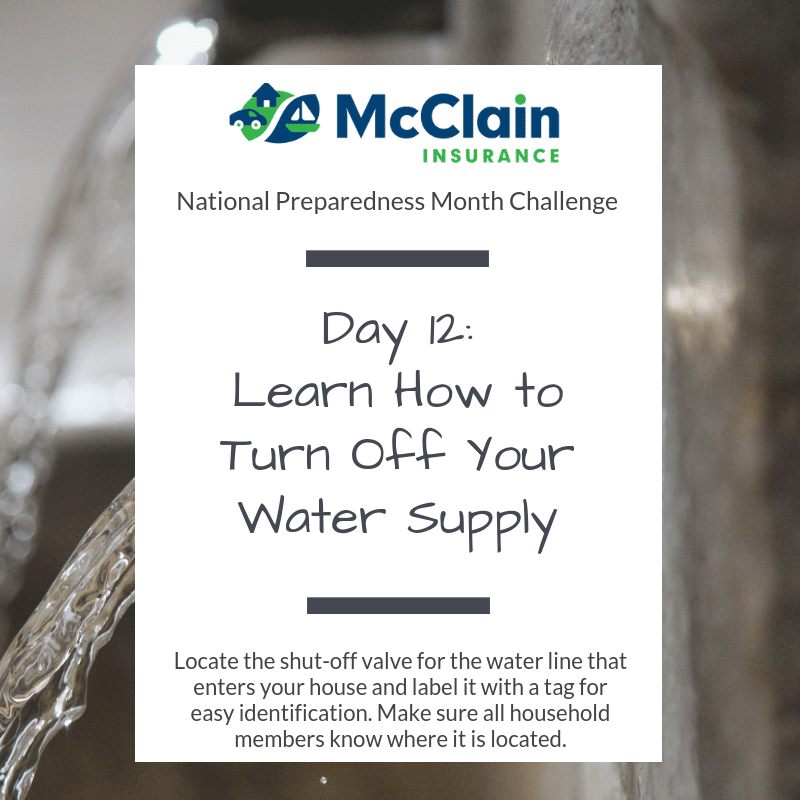
Day 12: Learn How to Turn Off Your Water Supply
According to our friends at Travelers Insurance, at certain times of the year, over 1/3 of homeowners’ claims are a direct result of water damage.
Before an emergency happens, locate the shut-off valve for the water line that enters your house and label this valve with a tag for easy identification. Make sure all household members know where it is located.
Not sure where your water shut-off is? PEMCO Insurance explains where you can commonly find shut-offs in Pacific Northwest homes:
Water can become a precious resource following many disasters, too. According to FEMA, after a disaster cracked lines may pollute the water supply to your home. They recommend shutting off water until authorities say it is safe for drinking.

Day 13: Learn How to Turn Off Your Gas Supply
Do you know how and when to shut off your home’s gas supply? Natural gas leaks and explosions are responsible for a significant number of fires after earthquakes and other disasters, so it’s critical everyone in your home knows how and when to turn off your gas supply.
The City of Seattle Office of Emergency Management explains how to shut off your home’s natural gas:
Start by finding your gas meter. It should be located somewhere outside on the perimeter of your home.
Next, make sure everyone in your household know when to turn off the natural gas. You only want to turn it off if you have some reason to believe there’s a leak. You may have a natural gas leak if:
- You smell natural gas (a sulfur or rotten egg smell)
- You hear natural gas leaking (a hissing sound0
To turn off the gas supply to your home, use a wrench to turn the shut-off valve on the gas meter 90 degrees until it is running perpendicular to the pipe.
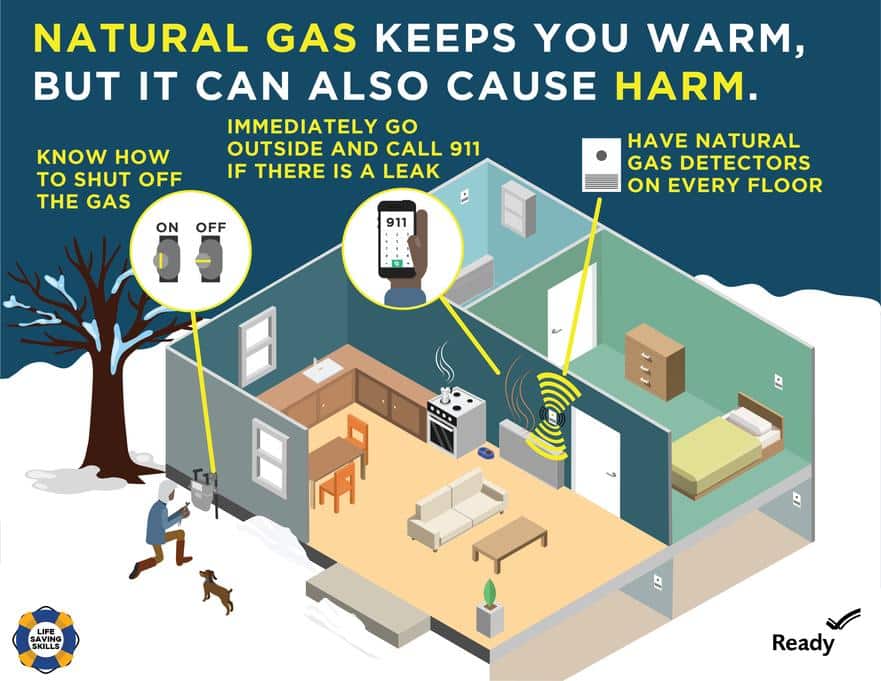
Remember: Keep a wrench in your emergency kit, and regularly clear bushes and debris outside your home so you have an easy path to your gas meter.
If you do turn off your gas – for your safety – do not turn it back on yourself. Contact your gas company to do so.
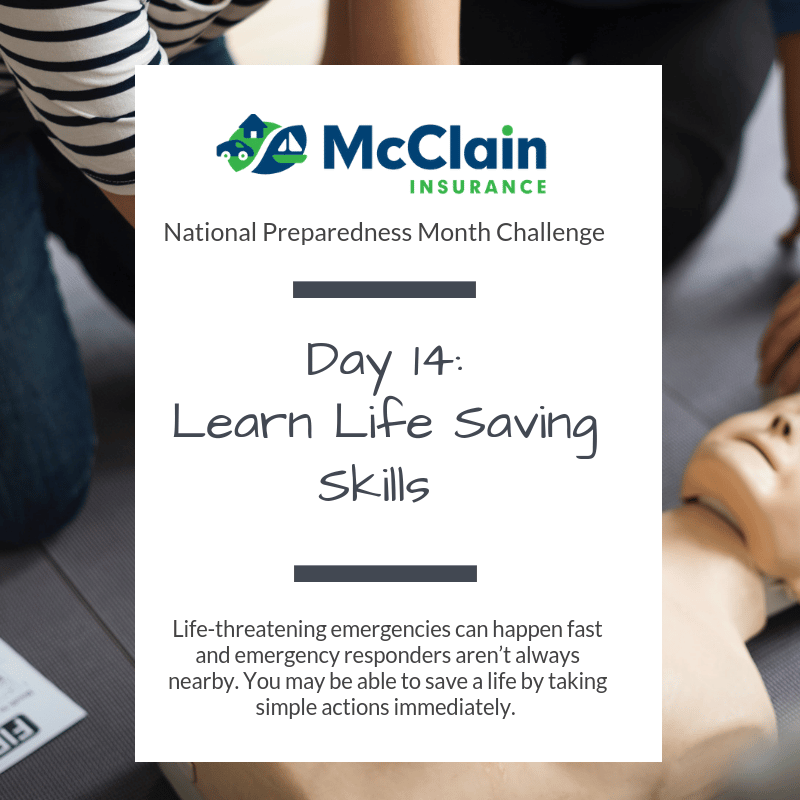
Day 14: Learn Life Saving Skills
Life-threatening emergencies can happen fast and emergency responders aren’t always nearby. You may be able to save a life by taking simple actions immediately. You may be the help until help arrives.
FEMA recommends everyone learns these five simple steps that may save a life:
- Call 9-1-1
- Stay Safe
- Stop the Bleeding
- Position the Injured
- Provide Comfort
Take FEMA’s free interactive “You Are the Help Until the Help Arrives” training here.
Day 15: Build a Basic Emergency Kit
Be prepared for a power outage and other small emergencies by having enough food water, and medications to last for at least 72 hours and ideally for two weeks.
Today, spend a few minutes creating or updating your basic emergency kit. FEMA recommends you include the following items, many of which you may already be in your home:
- Water: one gallon of water per person per day for at least three days, for drinking and sanitation
- Food – at least a three-day supply of non-perishable food
- Battery-powered or hand crank radio and an NOAA Weather Radio with tone alert
- Flashlight
- First aid kit
- Extra batteries
- Whistle to signal for help
- Dust mask to help filter contaminated air and plastic sheeting and duct tape to shelter-in-place
- Moist towelettes, garbage bags and plastic ties for personal sanitation
- Wrench or pliers to turn off utilities
- Manual can opener for food
- Local maps
- Cell phone with chargers and a backup battery

Day 16: Review Your Insurance Coverage
Not all insurance coverage is created equally.
If a disaster strikes, having the right insurance for your home is the best way to ensure you will have the resources to help you repair, rebuild, or replace whatever is damaged. FEMA explains why this is so important:
Need help reviewing your insurance protection? Give us a call! (425) 379-9200.

Day 17: Consider Earthquake Insurance
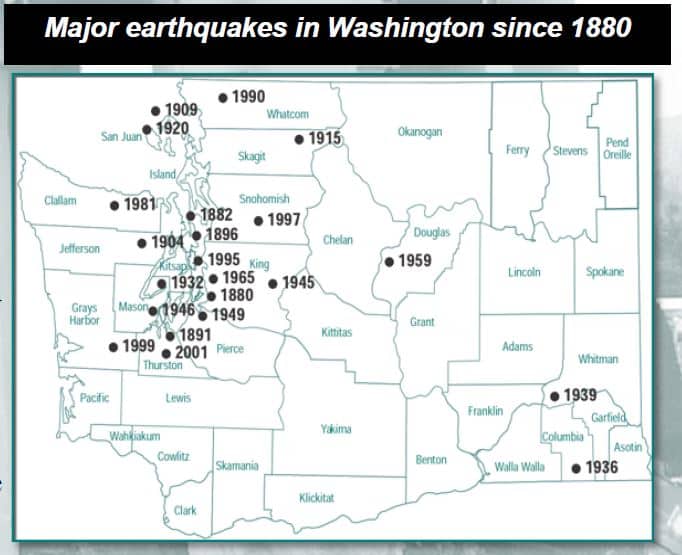
Washington has more than 1,000 earthquakes a year, giving us the second highest earthquake risk in the country. Although many of these earthquakes are too small to be felt, we’ve experienced 20 damaging earthquakes in the last 125 years:
We recommend earthquake insurance for all of our clients. Unlike standard homeowners policies, which typically exclude earthquake damage, earthquake insurance can provide coverage repairing or rebuilding your home after an earthquake, replacing belongings, and temporary housing costs if your home is not livable.
Day 18: Consider Flood Insurance
Did you know more than 40% of flood insurance claims are from areas at low risk for flooding?
Homeowners and renters insurance does not cover flood damage. Floods are the most common and costly natural disaster in the U.S. According to FEMA, just one inch of water can cause $25,000 in damage to your home. In fact, the average flood claim payout is $52,000.
We’ve put together a comprehensive blog with our top 5 reasons to add this crucial coverage.
Don’t forget: It takes 30 days for most flood insurance policies to go into effect. The time to purchase flood insurance is now, not when a disaster strikes.
Day 19: Create a Home Inventory
Imagine losing everything in a disaster, then having to list all of your possessions to file an insurance claim.
After a fire, burglary, or another event in which you lost possessions from your home, it may be difficult to remember the details of every one of the belongings that you have accumulated over the years. In this situation, having a current inventory of your possessions, including make and model numbers, may help you with any potential insurance claims. Taking the time to document your belongings now can help you recover faster after a loss.
We encourage all of our clients to complete a home inventory. Our blog will show you how .
Day 20: Update Your Insurance Protection
After creating your home inventory, update your insurance protection to ensure all your belongings have the coverage they need. Not sure where to start? Our team can help!
Not all insurance policies are created equally. First, make sure your insurance policy provides replacement cost coverage on our home or condo (if you own one) and personal belongings. Some insurance policies only provide depreciated, actual cash value coverage.
Many people don’t realize standard homeowners and renters insurance policies have coverage limitations for higher valued items like jewelry. On a typical home, condo, or renters insurance policy, jewelry is usually covered up to $1,500 per item, or $3,000 for the combined value of your jewelry.
If the value of an individual item (such as an engagement ring) exceeds the stated limit, there is no coverage for the difference… unless you purchased a “scheduled personal property” endorsement for the item.
This limited coverage clause applies not only for jewelry, but also for antiques, art, high-value rugs, coin collections, firearms, and some other items. Always read your insurance policy so you know what coverage limitations apply.
Day 21: Print Important Insurance Information
Today’s tip may be surprising: Keep a paper copy of important insurance information in your emergency kit. Yes, really!
After a natural disaster, you may be without phone or internet access for an extended period of time. In a situation like this, having a paper record of your policy numbers and insurance company contact information can make filing a claim easier.
Of course, we always recommend setting up your McClain Client Connection portal and signing up for an online account with your insurance company so you have access to your policy documents digitally, too.
Day 22: Know How to File a Claim
If your home, property, or car is damaged in a disaster, knowing how to file a claim will help make the claim process go smoothly. We recommend you:
- File Claims Promptly. Many policies have time limits on when you can file a claim.
- Save Receipts. Keep receipts for any construction or hardware supplies
you purchase, as well as hotel and restaurant expenses should you need to
relocate temporarily. - Take Pictures and Video. Record damage to your home, personal property, or vehicle. Keep copies for your records and to share with your insurer.
- Work with Your Adjuster. Cooperating with your claims adjuster can save time and assist you in receiving your settlement promptly.

Day 23: Keep Cash in Your Emergency Kit
Many disasters could stop ATMs and credit cards from working, such as earthquakes, floods, and civil emergencies.
A good rule of thumb is to keep cash on hand in one, five, ten, and twenty dollar denominations. Don’t store all your cash in one place.
Day 24: Safeguard Critical Documents
After a disaster, having your financial and medical records will be crucial to help you start the recovery process quickly:
Household Identification
- Photo ID to prove identity of household members
- Birth certificate to maintain or re-establish contact with family members
- Social security card to apply for FEMA disaster assistance
- Military service
- Pet ID tags
Financial and Legal Documentation
- Housing Payments to identify financial records and obligations
- Insurance policies to re-establish financial accounts
- Sources of income to maintain payments and credit
- Tax statements to provide contact information for financial and legal providers & apply for FEMA disaster assistance
Medical Information
- Physician information to provide doctors with health information if medical care is needed
- Copies of health insurance information to ensure existing care continues uninterrupted
- Immunization records
- Medications
Taking time now to safeguard these critical documents will give you peace of mind and help you avoid additional stress during the difficult days following a disaster.
Click here to download FEMA’s “Safeguard Critical Documents and Valuables” checklist.
Day 25: Know Your Deductibles
In a claim, your deductible is the amount of money you must pay out-of-pocket before your insurance kicks in.
Know what deductibles you’re responsible before a disaster strikes. This could be a flat deductible per policy – for example, $1,000 – or it could be a percentage deductible. You may also have a separate deductible for home and contents, such as on a flood insurance policy.
Day 26: Save for a Rainy Day
Did you know only about half of all Americans have an emergency fund?
If you haven’t already, one way to prepare is to start a “rainy-day fund.” This will help ensure you have the money needed for increased expenses that often come after a disaster.
Experts recommend that you have a minimum of three months of living expenses in your emergency fund. Consider all of your basic needs (rent, gas, food) as well as the needs of other people who depend on you financially.
The Balance, a personal finance website, has some tips to help you start your own emergency fund.
Day 27: Sign Up for Direct Deposit
If you receive paper checks from an employer or for federal benefits, consider signing up for direct deposit. This will ensure you receive your money on time no matter where you are after a disaster.
Day 28: Complete a Financial First Aid Kit
After a disaster, you’re still responsible for paying your mortgage, credit card statements, and other bills. Complete FEMA’s Financial First Aid Kit so you have a centralized record of your financial information after an emergency.
Download the Financial First Aid Kit here.
Day 29: Connect with Your Community
Connecting with others in your community now can help you know what kind of help is available after a disaster.
There are many great local resources to get you started:
- NextDoor
- Map Your Neighborhood
- Neighborhood “Buy Nothing” groups
- Community Emergency Response Team (CERT)
Day 30: Set Preparedness Goals
As you finish your personal 30-day preparedness challenge, take five minutes to reflect on your progress and set future preparedness goals.
Not sure where to start? Start building your “go bag.” See what’s in ours.
Ready.gov has a wide variety of resources to help you take the next step in your preparedness efforts.